Supplemental Guide For E-Verify Employer Agents
![]()
Supplemental Guide for E-Verify Employers Agents | Current as of May 2018

1.0 Introduction
This guide provides a high level overview of the E-Verify process that E-Verify employer agents must follow when using E-Verify on behalf of their clients. E-Verify employer agents must follow the guidelines set forth in the E-Verify Memorandum of Understanding for E-Verify Employer Agents and use this guide as a supplement to the E‑Verify User Manual.
For purposes of this manual, the term “E-Verify employer agent” means any person, company, or other entity that provides the service of using E-Verify to confirm employment eligibility of employees of third-party employers (or clients). Clients are required to complete Form I-9, Employment Eligibility Verification, for all new employees and must follow the guidelines set forth in the Memorandum of Understanding for Employers Using an E-Verify Employer Agent (or client MOU).
1.1 Privacy And Security Statement
The use of E-Verify requires the collection of personally identifiable information (PII). Employers must protect the privacy of employees who submit information to be processed through E-Verify and ensure that all personal information collected is safeguarded and used only for the purposes outlined in the MOU.
E-Verify protects PII in accordance with the National Archives and Records Administration (NARA) records retention and disposal schedule (N 1-566-08-7) by annually disposing of E-Verify records that are over 10 years old. This minimizes security and privacy risks associated with U.S. government retention of PII.
Failure to properly protect employee information can result in identity theft or fraud and can cause considerable inconvenience, harm or embarrassment to the employees or employer affected.
At a minimum, follow the steps in the Privacy Guidelines Overview to protect personal information and comply with the appropriate requirements.
Privacy Guidelines Overview
- Allow only authorized users to use E-Verify.
Ensure that only appropriate users handle information and create cases. - Secure access to E-Verify.
Protect passwords used to access E-Verify and ensure that unauthorized persons do not gain access to E-Verify. - Protect and store employee information properly.
Ensure that employee information is stored in a safe and secure location and that only authorized users have access to this information. - Discuss E-Verify results in private.
Ensure that all case results including Tentative Nonconfirmations (mismatch) and Final Nonconfirmations are discussed in private with the employee.
INFORMATION
- Ensure that all personally identifiable information is safeguarded.
- Provide all clients with training on E-Verify processes, policies, and procedures.
- Provide ongoing E-Verify training as needed to clients.
1.2 Form I-9 and E-Verify
Employers are required to timely and properly complete and retain Form I-9 for each employee they hire.
Under general Form I-9 practice, employees can voluntarily provide their Social Security numbers (SSN) on Form I-9. However, because SSNs are required for employers to create E-Verify cases, all newly hired employees including seasonal, temporary, and rehired employees of E-Verify employers must provide their SSNs.
Additionally, a photo matching step may be triggered if the employee provided a U.S. passport, passport card, Permanent Resident Card (Form I-551), or Employment Authorization Document (Form I-766). When the employee presents one of these documents, your clients must provide you with clear photocopies of the front and back of the documents (or in the case of a U.S. passport, copies of the Passport ID page and the Passport Barcode page). For specific guidance related to Form I-9 and photo matching, refer to the E-Verify User Manual.
1.3 Create a Case
E-Verify cases must be created no later than the third business day after the employee starts work for pay. E-Verify employer agents who learn that they inadvertently failed to create a case by the third business day after the employee started work for pay should bring themselves into compliance immediately by creating a case for the employee and indicating the reason that the case was not created within three days of the employee’s first day of employment. E-Verify provides a drop-down list of reasons for you to select or you can provide your own reason in the field provided.
Information used to create an E-Verify case comes from the employee’s completed Form I-9. E-Verify employer agents must obtain Forms I-9 from their clients before creating E-Verify cases on their behalf. Additional information on E-Verify and Form I-9 is available in the E-Verify User Manual.
To use E-Verify, you must first log in with your assigned user ID and password. Then, follow the steps outlined in How to Create a Case – Process Overview.
How to create a case – Process Overview
- From the E-Verify home page, click Cases and select Create New Case; or
- Click Create New Case from quick link below.
Employee Information and Attestation
- Enter the employee’s information from Section 1 of Form I-9. If you do not enter required information, E-Verify generates a field error message.
- If the employee provided an email address on Form I-9, you must enter it into E-Verify. E-Verify may send the employee email notifications with information about his or her E-Verify case. If the employee did not provide an email address on Form I-9, click the box next to No email address provided. Click Continue.
- The employee's phone number is an optional field for users. If the employee provided a telephone number on their Form I-9, enter that number.
- From Section 1 of the employee’s Form I-9, choose the appropriate option for Citizenship Status. Click Continue.
Employer or Authorized Representative Review and Verification
- Click List A Document or List B & C Document, using information provided in Section 2 of the employee’s Form I-9. Then select the document or combination of documents provided in Section 2. Click Continue.
Additional Case Details
- Type the employee’s first day of employment recorded in Section 2 of Form I-9 into the Employee’s First Day of Employment field. Alternatively, you may click Today, 1 Day Ago, or 2 Days Ago and the corresponding date automatically populates in the Employee’s First Day of Employment field. If you select Other, the system requires you to manually enter the employee’s first day of employment.
- If the case is being created 3 or more days past the employee’s first day of employment, you must provide a reason for the delay. Select a reason from the drop-down menu.
- Provide Visa Number when applicable.
- The Student and Exchange Visitor Information System (SEVIS) ID number is an optional field.
- Employee ID is an optional field for users who wish to assign an internal tracking code to a case. If desired, enter a unique identifier assigned to this case. Click Continue.
Review Case
- Users are prompted to review and confirm that the information entered is correct and may edit case details before submitting the case.
- Click Submit Case to confirm that the case information accurately reflects the information on the employee’s Form I-9.
IMPORTANT:
- If you need more time to verify the information is correct, you may click Save & Exit to exit the case. You can locate the case later under Cases. If you determine you no longer need to submit the case, you may click the Close Case link and the case will be closed without being submitted.
- By clicking Close Case, it will result in the case automatically closing without being submitted.
2.0 Clients
The Clients menu is only available to E-Verify employer agents. This menu enables E-Verify employer agents to:
- Enroll new clients
- View and update client information
- View their clients’ memorandum of understanding (MOU)
- Terminate clients from participating in E-Verify
This section provides step by step guidance on each of these functions.
2.1 Client Enrollment
E-Verify employer agents must enroll their clients before they can create E-Verify cases for them. To enroll a client in E-Verify, follow the steps outlined in the New Client Enrollment – Process Overview.
New Client Enrollment – Process Overview
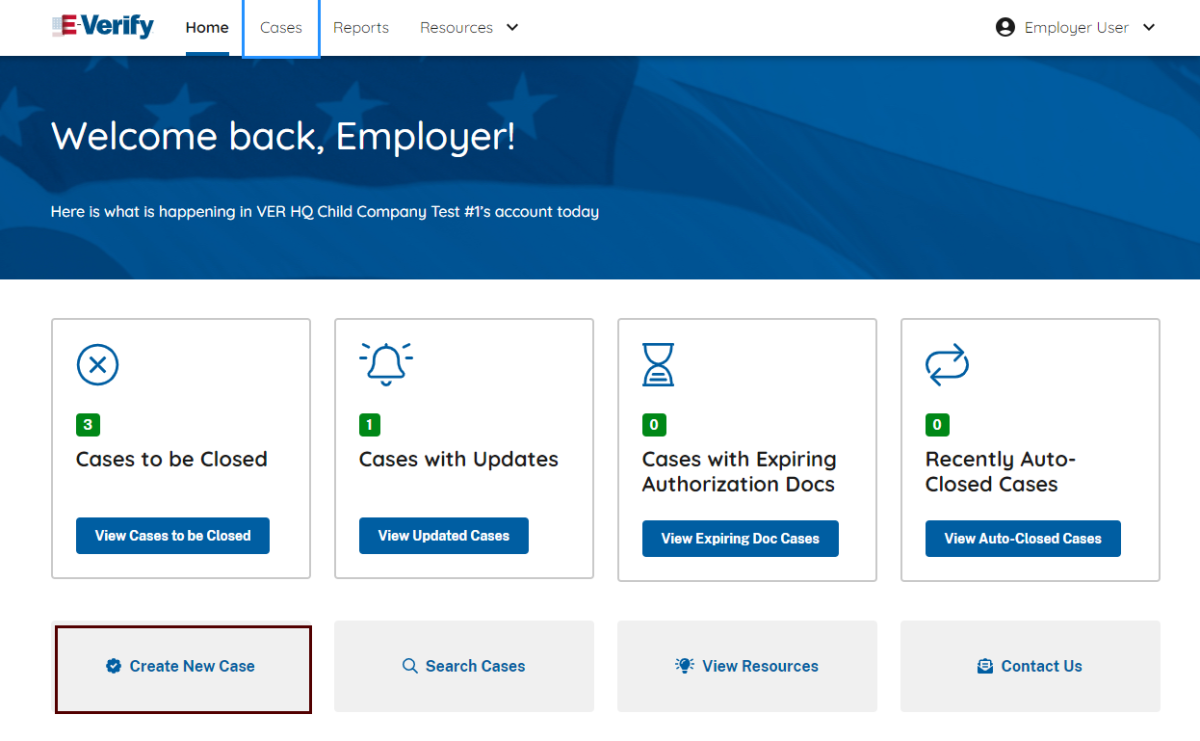
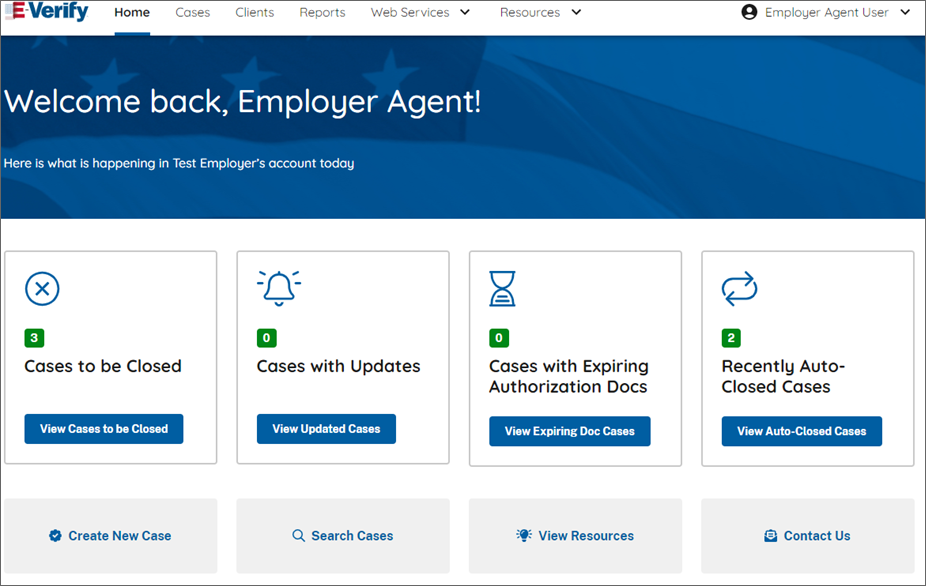
- After login, you will see the Home screen.
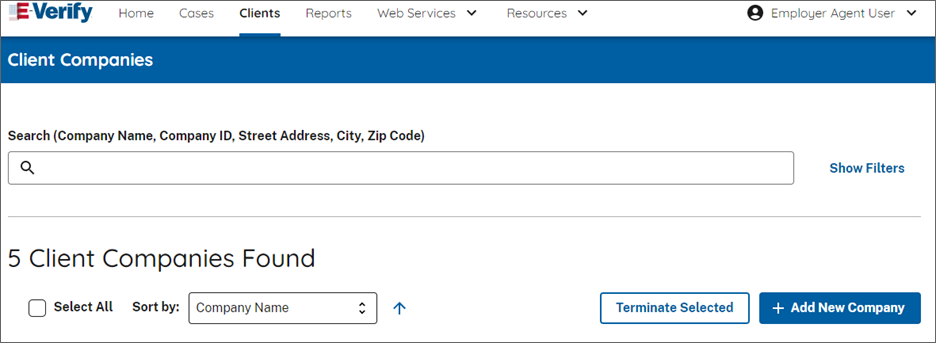
- Click on Clients, and the Client Companies screen will appear. If searching for a company, enter the information in the search location and view the results.
- To add a new company, click Add New Company.
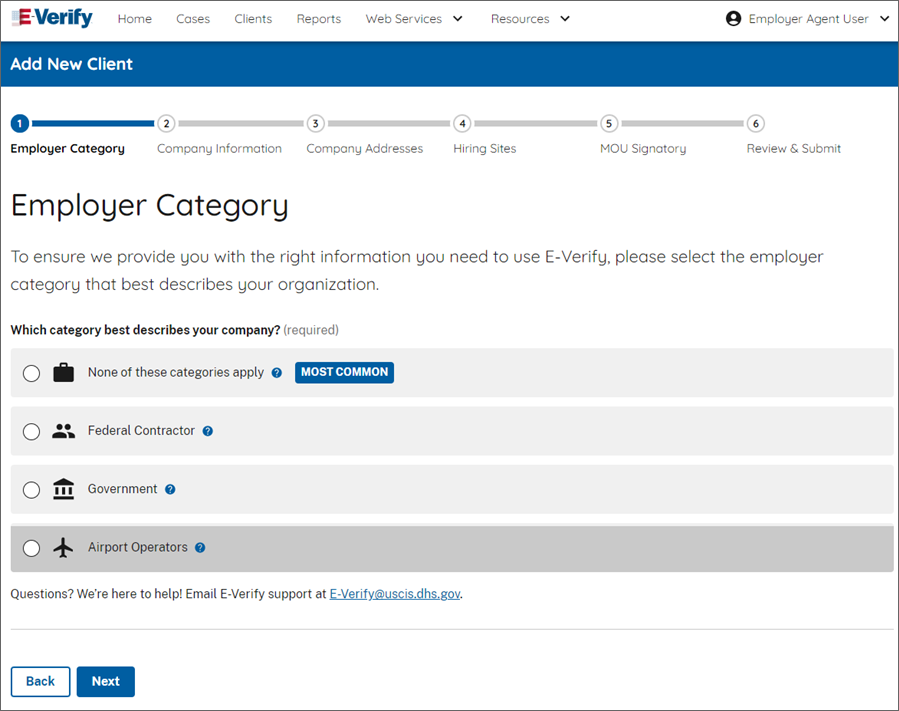
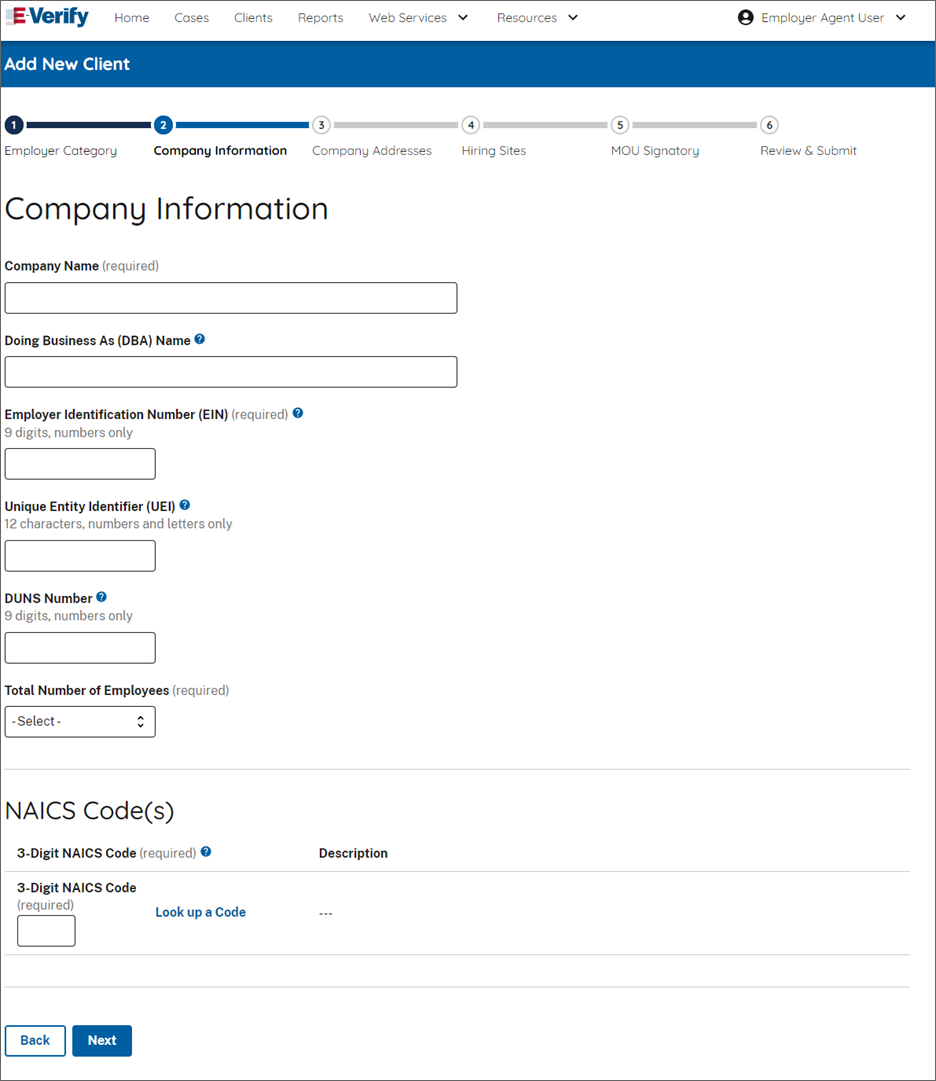
- On the Add New Client screen, select the Employer Category for your client. Then select Next.
- Enter your Company Information as required.
- Enter the North American Industry Classification System (NAICS) code for your client. If you do not have the number, click Look up a Code to determine the company's NAICS code.
- Select the appropriate sector and subsector from the drop-down list. The resulting NAICS code will appear.
Complete Client Enrollment:
- Select which category best describes your client’s organization. Click Save & Continue.
IMPORTANT: If you indicate Federal Contractor with FAR E-Verify Clause, you will be required to select the federal contractor category that best describes your client’s organization and indicate which of your client’s employees will be verified. For additional information refer to the E-Verify Supplemental Guide for Federal Contractors. - Click Add Hiring Site to add participating hiring sites. Enter all the required information, and then click Next.
Note: When an employee is hired remotely and has a third-party employer agent complete Form I-9, for E-Verify purposes the “hiring site” is the location of the third-party employer agent where Form I-9 was completed, not the home of the employee. To add multiple hiring sites, See Section 2.1.3, Bulk Upload of Hiring Sites. - To designate a person with authority to sign the MOU, click Add MOU Signatory, enter information and then click Add MOU Signatory.
IMPORTANT: Every employer must have at least one person assigned as a contact for E-Verify issues. One of your client’s contacts must serve as the MOU signatory. The MOU signatory is the person with authority to bind the client company to the E-Verify terms and conditions and his or her name will appear on the client MOU. The MOU signatory can also serve as a contact for the client. - Click Next to continue.
- Review the client information and click Submit Enrollment. After the enrollment request is submitted, the status changes to Pending Registration. E-Verify employer agents can search for a client in Pending Registration status to update or delete the registration.
An email is sent to the MOU signing authority that you assigned during enrollment. Your client will need to electronically sign the MOU once the client receives the email. The client has 24 hours to view, sign or decline the MOU. If the client accidentally declines the MOU or the link expires, you can resend the request for the client to sign the MOU. See Section 2.1.2, Re-send Electronic Client MOU.
Upon enrollment, E-Verify employer agents must provide the E-Verify Participation and Right to Work posters in English and Spanish to their clients (both appear below). Clients must display both posters in prominent locations clearly visible to prospective employees and all employees, including those hired to work in a remote setting. This can include displaying the posters digitally, online, in hard copy at physical locations, and providing a copy of the posters with job application materials. In addition to displaying the English and Spanish versions of the E-Verify Participation poster, you may also display any of the foreign language versions provided by E-Verify.
E-Verify employer agents should provide the client with new participation posters when updates are made by DHS so that employees, applicants, and the public have the most recent and complete information regarding E-Verify. After logging in to E-Verify, the posters are found under View Essential Resources.
E-Verify Participation Notifications
Notice of E-Verify Participation
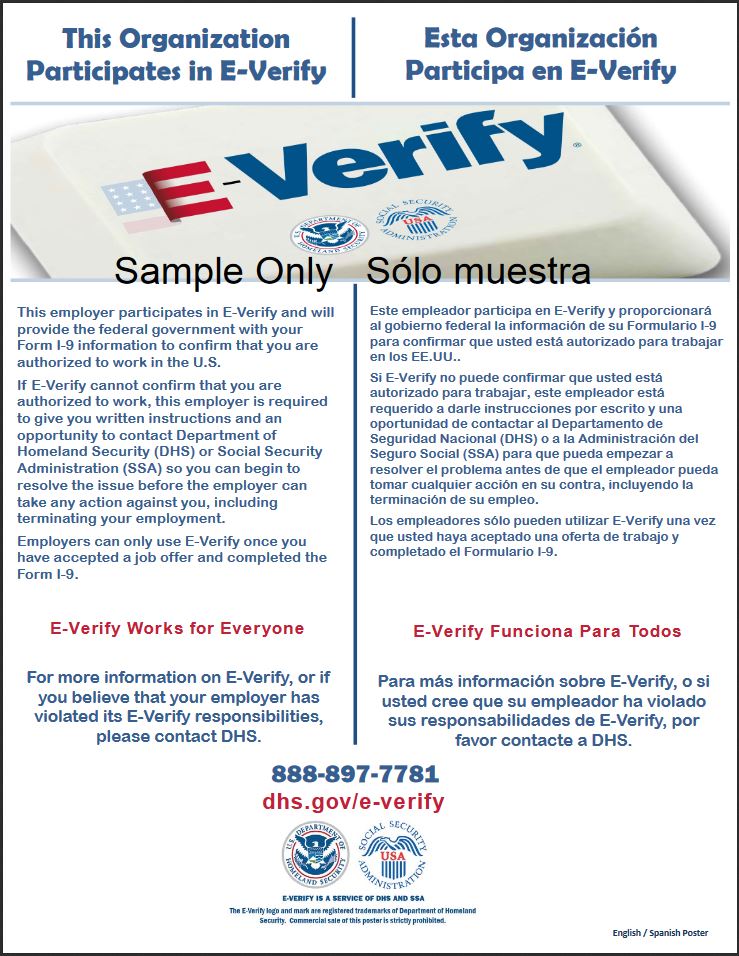
Provided by DHS
Right to Work Poster
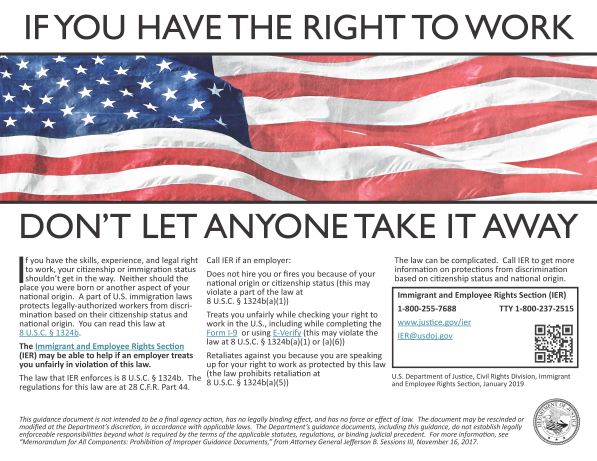
Issued by Department of Justice, Immigrant and Employee Rights Section
2.1.1 Draft Enrollments
E-Verify saves the enrollment information each time you click Save & Continue. This feature allows E-Verify employer agents to continue the client’s enrollment process at a later time. To complete a client’s enrollment, follow the steps outlined in the Manage Draft Enrollments – Process Overview.
Manage Draft Enrollments – Process Overview
Search for the client that has a draft enrollment in process. See Section 2.2, Client Search.
You can select the Draft filter on the Search Clients page to view all draft enrollments.
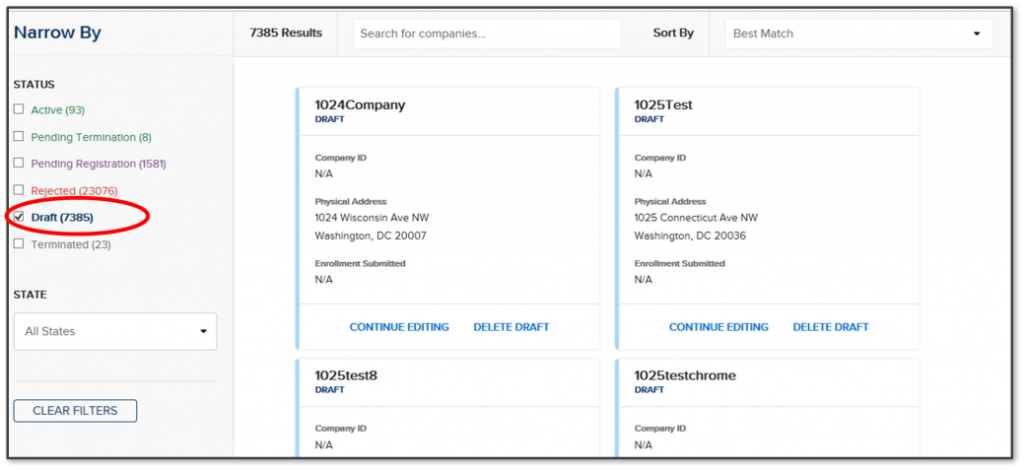
To continue with the enrollment process for the client, Click Continue Editing.
OR
- To delete the draft enrollment, Click Delete Draft.
2.1.2 Re-send Electronic Client MOU
Clients of E-Verify employer agents must electronically sign the MOU to complete their client’s enrollment. The client has 24 hours to sign the MOU once the E-Verify employer agent submits the enrollment. If the client declines the MOU or the link expires, E-Verify employer agents can resend the MOU to the client. To complete this process, follow the steps outlined in Electronically Re-send Client MOU – Process Overview.
Electronically Re-send Client MOU – Process Overview
- Search for the client. See Section 2.2, Client Search.
- Click View and then Edit Company Profile for the client.
- Click Re-Send Electronic MOU.
- Click Send Email.

2.1.3 Bulk Upload of Hiring Sites
The bulk upload function allows you to add multiple hiring sites by uploading a file. To use the bulk upload function, you must create a comma separated value (.csv) file with the hiring site addresses. To add multiple hiring sites, follow the steps outlined in the Bulk Upload of Hiring Sites – Process Overview.
Bulk Upload of Hiring Sites – Process Overview
- From the Clients tab, scroll down to the list of client companies, click View Company Profile.
- On the Company Information page click Edit Hiring Sites.
Select + Add Hiring Site and enter the street address, city, state, and zip code and click Add Hiring Site to add your hiring sites one at a time.
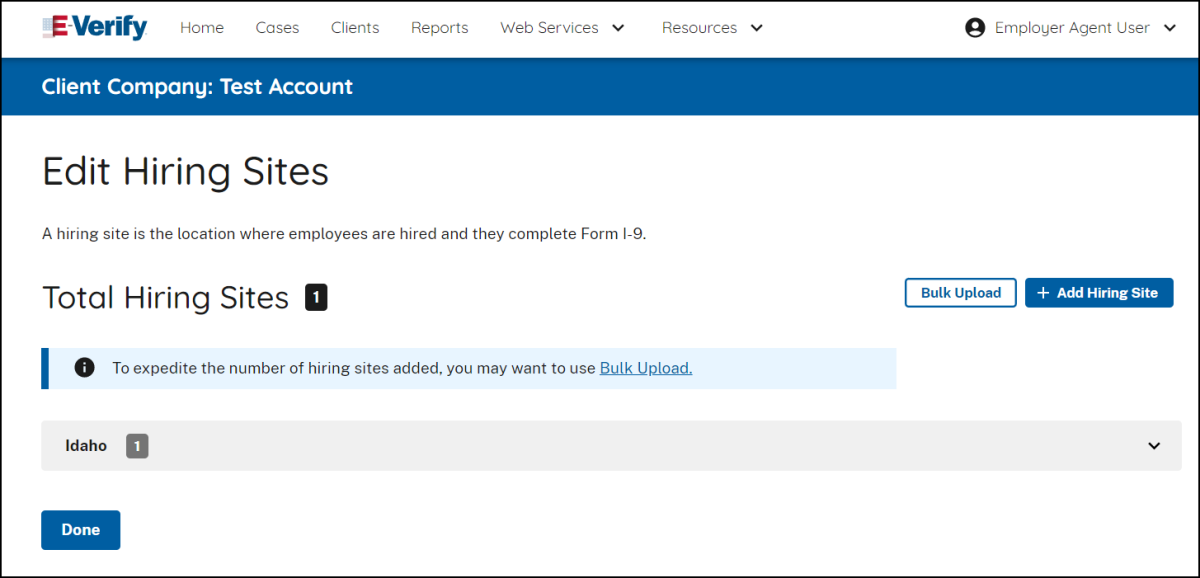
OR
- Select Bulk Upload to add multiple hiring sites by uploading a file.
To use the bulk upload function, you must create a comma separated value (.csv) file with the hiring site addresses.- If you need to create a .csv file, click Download CSV Template to open a pre-formatted .csv file. Add the hiring site addresses to the .csv file and save the document.
You also can drag the .csv file or click ‘choose from folder’ to locate the file and click Bulk Upload Hiring Sites.
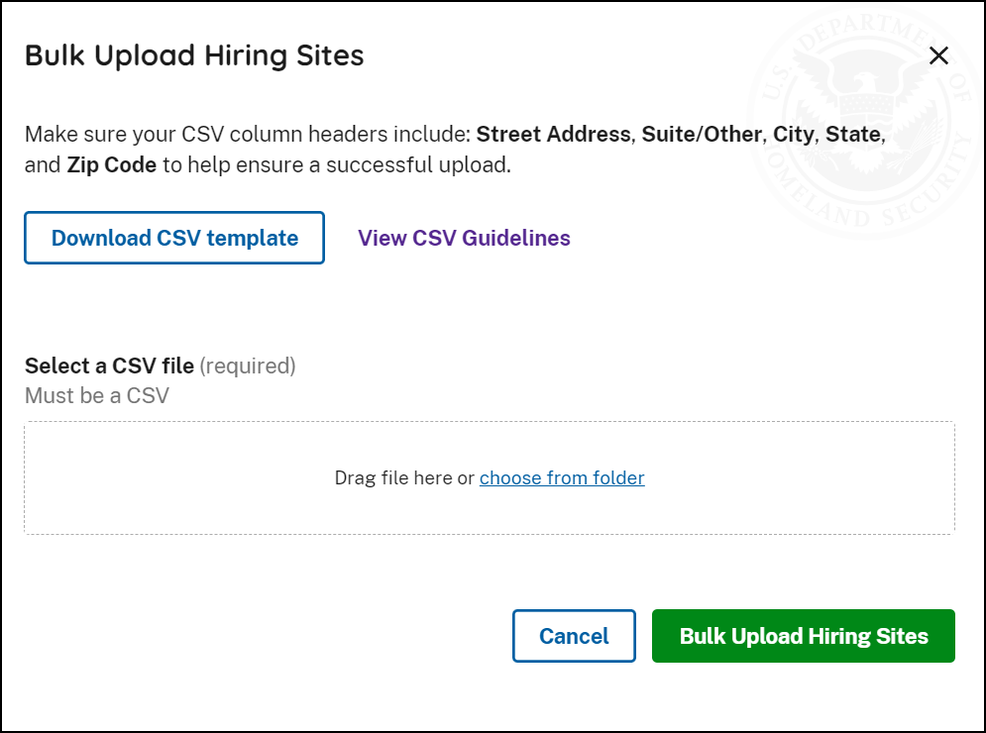
- To help you prepare a spreadsheet to bulk upload large amounts of hiring sites data into E-Verify, click View CSV Guidelines.
- If you encounter errors, click Export Errors from the highlighted error banner displayed under Total Hiring Sites.
- Correct exported errors, save the file, and click Bulk Upload to upload the document again.
- Click Bulk Upload Hiring Sites to complete the bulk upload process for hiring sites.
2.2 Client Search
E-Verify employer agents can search for their clients using the features in Manage Clients. To search for a client, follow the steps outlined in the Search Clients – Process Overview.
Search Clients – Process Overview
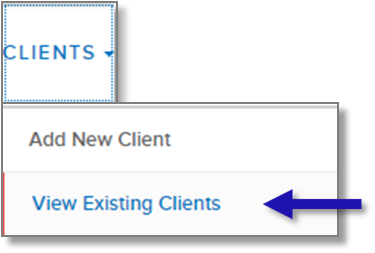
From Clients, click View Existing Clients.
Use the search bar (1) or check the filter options (2) to search for clients by their status or state. The search bar field can be used to search for a company name, company status or MOU Signed Date.
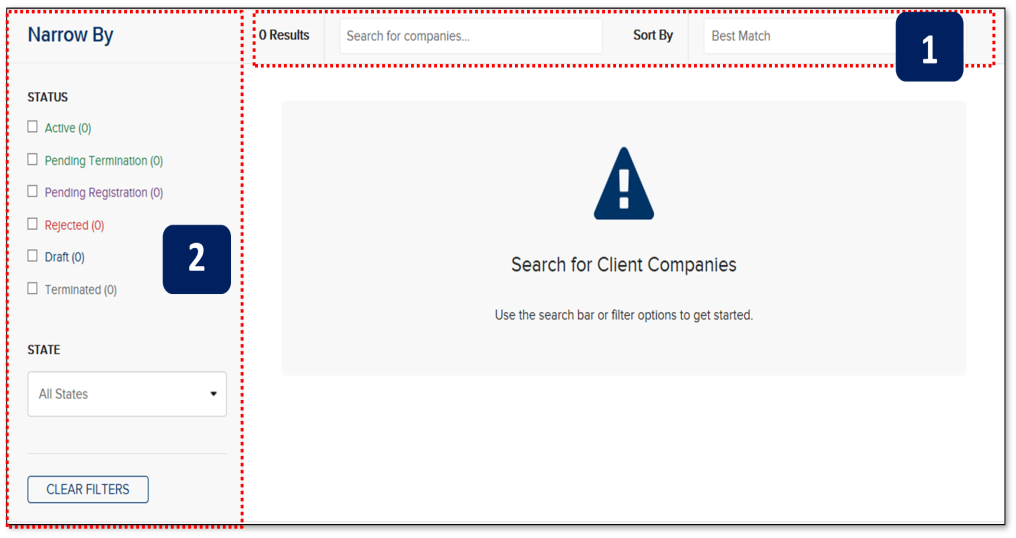
- Click View for the client you want to access. Follow the steps outlined in the Update Client Information – Process Overview to make changes to a client account.
2.2.1 Update Client Information
E-Verify employer agents can make changes to their clients’ information including the company address, employer category, North American Industry Classification System (NAICS) code, hiring sites or point of contact list by updating information under the Manage Clients menu. To update client information in E‑Verify, follow the steps outlined in the Update Client Information – Process Overview.
Update Client Information – Process Overview
- Search for the client that requires updates. See Section 2.2 Client Search.
- Click View and then Edit Company Profile for the client you want to update.
Click the edit button in the section you want to modify, including: company information, category, hiring sites and contacts.
Updated Hiring Site Requirement:
E-Verify employer agents are now required to enter the complete address for each client hiring site that participates in E-Verify.
Hiring sites entered in E-Verify before this policy change can be viewed as read-only from the hiring sites tab. Any hiring sites without an address must be deleted before the hiring sites with an address can be added. Hiring sites with an address can be added manually or through the bulk upload process. See Section 2.1.3, Bulk Upload of Hiring Sites.
- Make the required changes and click Save & Continue.
2.2.2 Client Company Information Fields
There are several fields that can be updated for your client in the Company Information page. Those fields are listed in the Client Information Overview.
CLIENT INFORMATION OVERVIEW
| Company Information | Name of the client company enrolled in E-Verify and its doing business as name, Employer Identification Number, DUNS number, physical address, mailing address, NAICS Code, Sector, Subsector, employee category and total number of employees |
|---|---|
| Company Category | Employer category |
| Hiring Sites | Total hiring sites |
| Contacts | Total contacts |
2.2.3 View Client Memorandum of Understanding (MOU)
Program administrators can view the client MOU signature page for every one of their clients enrolled in E-Verify. A blank MOU template is also available to program administrators. To view a particular client’s MOU, follow the steps outlined in the View Client MOU – Process Overview.
View Client MOU – Process Overview
- Search for the client. See Section 2.2, Client Search.
- Click View and then Edit Company Profile for the client and scroll to the bottom of the Company Information page.
Select the link to view the client’s MOU signature page, the current MOU, or the historic MOU. The historic MOU will be the same as the current MOU if the MOU has not been updated since the client was enrolled.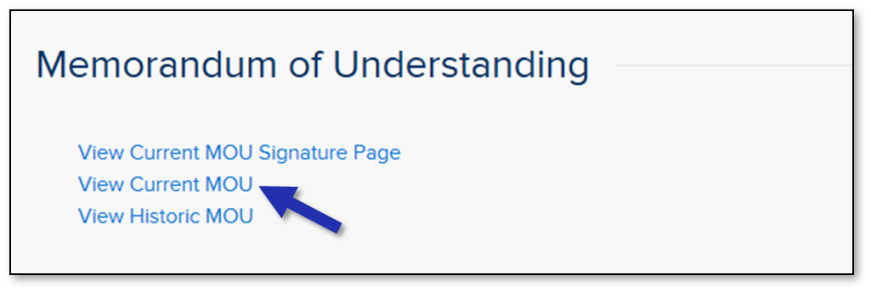
2.3 Terminate Client Participation
Client participation in E-Verify may be terminated voluntarily. To terminate participation for a client, E‑Verify employer agents must submit a termination request to E-Verify no later than 30 days in advance of the date the client would like to close its account. E-Verify employer agents may request client termination electronically through E-Verify or email by submitting a written termination notice to E‑Verify@uscis.dhs.gov or by fax to 202-443-0215.
During this 30-day period, E-Verify Employer Agents must resolve all open cases in E-Verify on behalf of the client, and they must not use E-Verify to create new cases. E-Verify Employer Agents are required to close all open E-Verify cases, even after the request to terminate the E-Verify account is made.
Once an account is terminated, all access to the account and its associated records is gone. To preserve the records from an E-Verify account, refer to Section 5.0 of the E-Verify User Manual to create and retain a user audit report before the account is terminated.
To request termination of client participation through E-Verify, follow the steps outlined in the Terminate Client Account – Process Overview.
Terminate Client Participation – Process Overview
- Search for the client whose participation you will terminate. See Section 2.2, Client Search.
- Click Termination Request Reason from a drop-down list.
- Click Yes, Request Termination.
- You will receive an email confirming that your account is terminated in 30 days.
Update or Cancel Termination:
Once termination is requested, the client will be in Pending Termination status for 30 days. E-Verify employer agents may return to E-Verify within 30 days to update the reason for termination or cancel the request.
You will receive an email confirming that the client’s account is terminated.
3.0 E-Verify Process Overview
E-Verify employer agents are not able to create a case in E-Verify for their clients until they have enrolled the client. The initial verification page contains a field in which the E-Verify employer agent must select the client corresponding with the employee being verified.
The E-Verify process begins with a completed Form I-9. E-Verify confirms employment eligibility by comparing the employee’s Form I-9 information entered in E‑Verify by the E-Verify employer agent with the information in records available to the Department of Homeland Security (DHS) and/or Social Security Administration (SSA).
3.1 Case Results
After Form I-9 information has been entered into E-Verify, E-Verify promptly provides an initial case result. An initial case result is the first, and sometimes final, case result provided by E-Verify. An overview of the case result is listed in the Case Results – Overview.
Case Results - Overview
Employment Authorized | The employee’s information matched records available to DHS and/or SSA. |
|---|---|
E-Verify Needs More Time | This case was referred to DHS for further verification. |
Tentative Nonconfirmation (Mismatch) | Information did not match records available to DHS and/or SSA. Additional action is required. |
Case in Continuance | The employee has contacted DHS or visited an SSA field office, but more time is needed to determine a final case result. |
Close Case and Resubmit | DHS or SSA requires that you close the case and create a new case for this employee. This result may be issued when the employee’s U.S. passport, passport card, or driver’s license information is incorrect. |
Final Nonconfirmation | E-Verify cannot confirm an employee’s employment eligibility after the employee contacted DHS or visited SSA. |
Each case result is unique and may or may not require additional action by you, your client and/or the employee. For specific guidance related to case results, refer to the E-Verify User Manual.
Related Resources
3.1.1 Tentative Nonconfirmation (Mismatch) Process Summary
A mismatch case result means that the information entered into E-Verify does not initially match records available to DHS and/or SSA. It is possible for an employee to receive a dual mismatch, which means the case received a mismatch result from both agencies at the same time because information entered into E-Verify did not match records available to both DHS and SSA. A mismatch does not necessarily mean that the employee is not authorized to work in the United States; however, additional action is required to resolve the issue. If the case results in a mismatch in E-Verify, below is a summary of the actions you, your client and the employee must take to complete the referral process as soon as possible within 10 federal government working days after E-Verify issued the mismatch result.
Employers may not terminate or take any other adverse action against an employee (such as denying work, delaying training, withholding pay, or otherwise assuming that he or she is not authorized to work) because of the mismatch, until the mismatch becomes a Final Nonconfirmation.
E-Verify Employer Agent Action
- Notify the client of the mismatch case result.
- Instruct the client to notify the employee that they must tell you their decision as soon as possible by the 10th federal government working day after E-Verify issued the mismatch result or you will close the case in E-Verify.
- Print the Further Action Notice and send it to the client.
- Instruct the client to review the Further Action Notice privately with the employee.
- Instruct the client to have the employee indicate on the Further Action Notice whether or not he or she will take action to resolve the mismatch.
- Instruct the client to have the employee sign and date the Further Action Notice printed in English, and then provide the employee a copy of the Further Action Notice in English (and a translated version, if appropriate).
- Instruct the client to keep the original signed Further Action Notice on file with Form I-9.
- Take next action based on the employee’s decision to take action or not regarding the mismatch.
If the employee will take action to resolve mismatch:
- Print the Referral Date Confirmation and provide it to the client.
If the employee does not give the client their decision within 10 federal government working days:
- Close the case in E-Verify. DHS will update the employee’s case with a final case result of Final Nonconfirmation.
- Indicate whether the employee is no longer employed or the employee will continue to work for the client.
The Client's Action
- Review the Further Action Notice privately with the employee.
- Have the employee indicate whether they will take action to resolve the mismatch on the Further Action Notice by the end of the 10th federal government working day after E-Verify issued the mismatch.
- Instruct employee to sign and date the Further Action Notice.
- Provide a copy of the signed Further Action Notice to the employee.
- Keep the original signed Further Action Notice on file with the employee's Form I-9.
- Send a copy of the signed Further Action Notice to the E-Verify employer agent.
- If the employee chooses to take action to resolve the mismatch, provide him or her with the Referral Date Confirmation.
- Instruct the employee that they must tell you their decision as soon as possible by the 10th federal government working day after E-Verify issued the mismatch result or you will close the case in E-Verify.
The Employee's Action
- Decide whether to take action to resolve the mismatch and indicate the choice on the Further Action Notice by the end of the 10th federal government working day after E-Verify issued the mismatch.
- Acknowledge receipt of mismatch by signing and dating the Further Action Notice.
- Take next action based on decision to take action or not to resolve the mismatch.
- Notify the employer of your decision by the 10th federal government working day after E-Verify issued the mismatch result or they will close the case in E-Verify.
If employee will take action to resolve the mismatch:
- Contact DHS or visit an SSA field office with a copy of the Further Action Notice within 8 federal government working days.
Related Resources
Social Security Administration Resumes E-Verify Operations
3.2 Final Case Resolution
To complete the E-Verify process, every case must receive a final case result and be closed. You must close every case and communicate the final case result to your client. Additional information on case closure is available in the E-Verify User Manual.
4.0 Resource and Contact Information
The E-Verify public website is the primary resource for all E-Verify information, but do not hesitate to contact us via phone or email. For easy access to online resources, USCIS suggests that employers bookmark or save the websites as favorites for easy access to them in the future.
E-Verify Resources
E-Verify Public Website: www.E-Verify.gov
- General information about E-Verify
- Program information and statistics
- E-Verify user manuals
- E-Verify quick reference guides
- E-Verify Questions and Answers
- Information about employee rights and employer obligations
E-Verify Enrollment Application: https://everify.uscis.gov/enroll
- Website for initial employer enrollment
E-Verify Access for Employers and Corporate Administrators: https://everify.uscis.gov/emp
- User access to E-Verify
E-Verify Access for E-Verify Employer Agents: https://everify.uscis.gov/esp
- User access to E-Verify
E-Verify Contact Information
The E-Verify Contact Center is available to assist you with using E-Verify, password resets, cases and technical support. We can also answer your questions about E-Verify policies and procedures, Form I-9 and employment eligibility. We are available Monday through Friday, from 8:00 a.m. to 8:00 p.m. Eastern time, except when the federal government is closed. For users with hearing and speech impairment, TTY phone is available from 8:00 a.m. to 8:00 p.m. Eastern time.
For E-Verify Employer Agents
For Clients
For Employees
U.S. Department of Justice, Civil Rights Division, Immigrant and Employee Rights Section (IER)
IER is available to answer your questions about immigration-related employment discrimination, including discrimination based on citizenship status, immigration status or national origin in the Form I-9 and E-Verify processes. IER can provide immediate assistance by phone through its hotlines Monday through Friday, from 9:00 a.m. to 5:00 p.m. Eastern time, except when the federal government is closed. Calls can be anonymous and language interpretation services are available.
For Employers
For Employees
Equal Employment Opportunity Commission (EEOC)
EEOC is available to answer your questions about employment discrimination, including discrimination based on race, color, religion, sex (including pregnancy), national origin, age (40 or older), disability, or genetic information.