
E-Verify employer agents must enroll their clients before they can create E-Verify cases for them. To enroll a client in E-Verify, follow the steps outlined in the New Client Enrollment – Process Overview.
New Client Enrollment – Process Overview
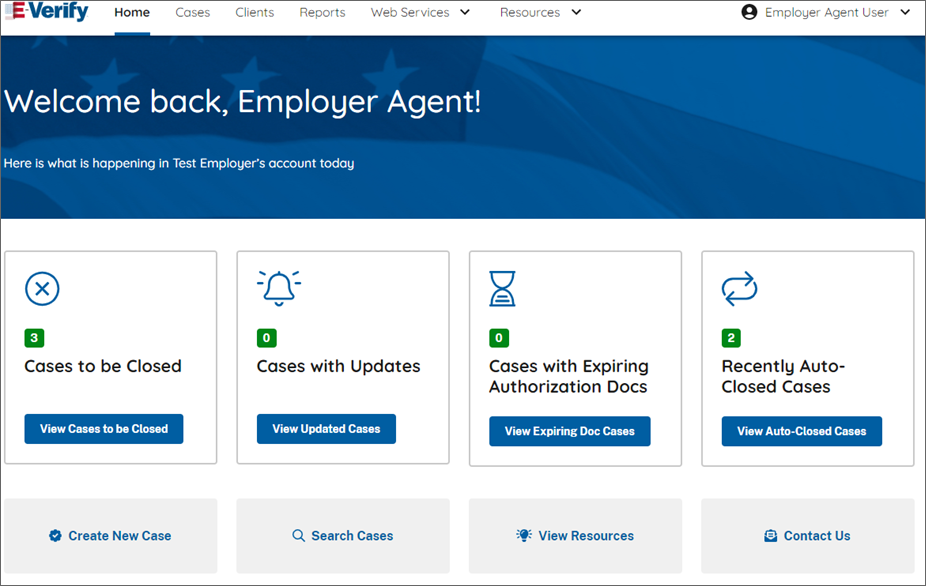
- After login, you will see the Home screen.
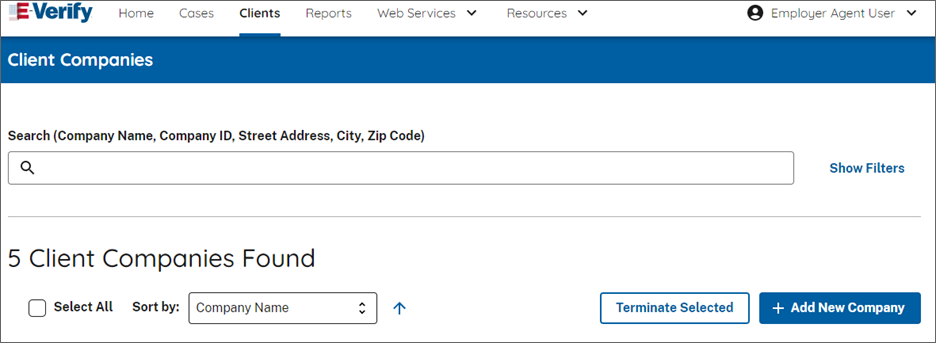
- Click on Clients, and the Client Companies screen will appear. If searching for a company, enter the information in the search location and view the results.
- To add a new company, click Add New Company.
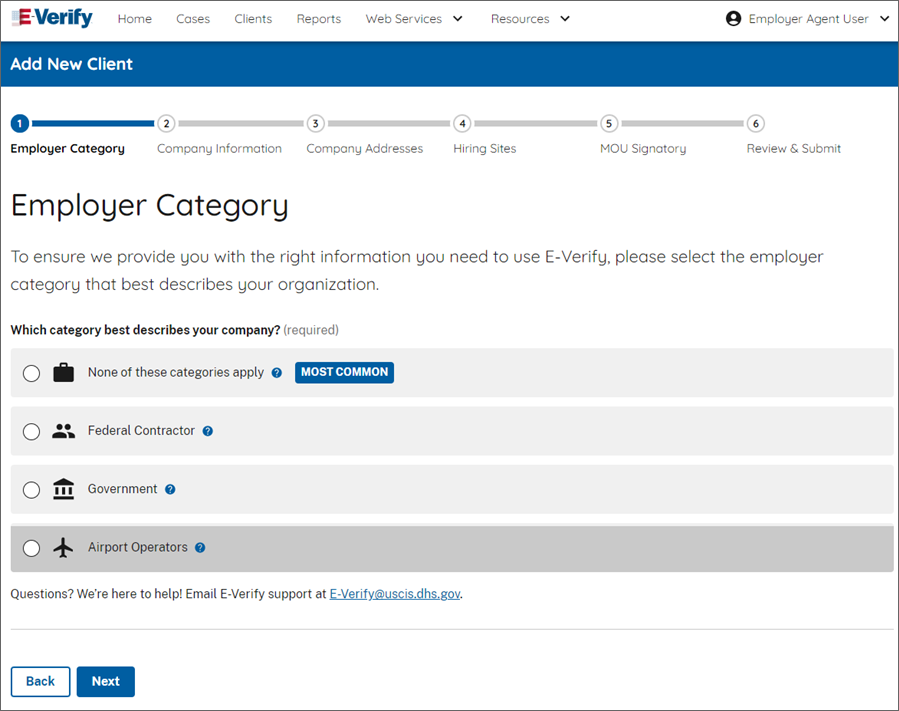
- On the Add New Client screen, select the Employer Category for your client. Then select Next.
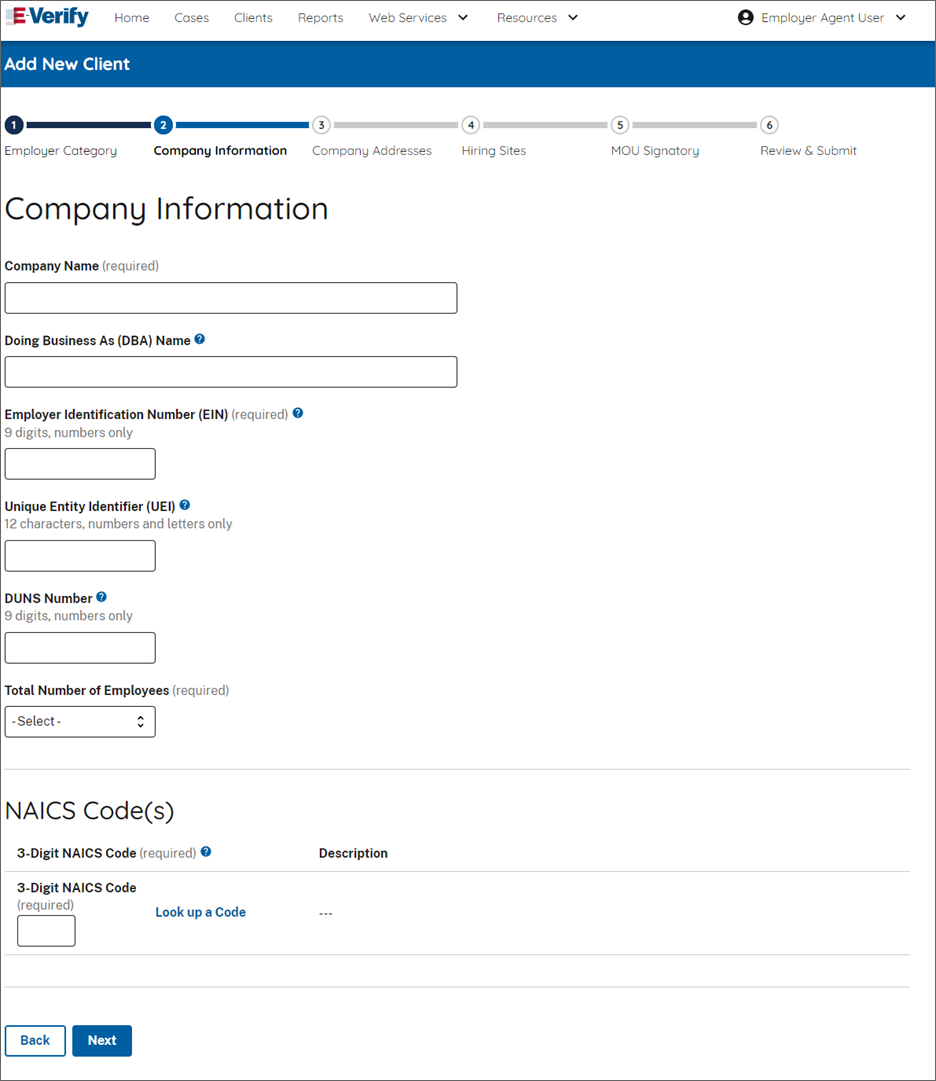
- Enter your Company Information as required.
- Enter the North American Industry Classification System (NAICS) code for your client. If you do not have the number, click Look up a Code to determine the company's NAICS code.
- Select the appropriate sector and subsector from the drop-down list. The resulting NAICS code will appear.
Complete Client Enrollment:
- Select which category best describes your client’s organization. Click Save & Continue.
IMPORTANT: If you indicate Federal Contractor with FAR E-Verify Clause, you will be required to select the federal contractor category that best describes your client’s organization and indicate which of your client’s employees will be verified. For additional information refer to the E-Verify Supplemental Guide for Federal Contractors. - Click Add Hiring Site to add participating hiring sites. Enter all the required information, and then click Next.
Note: When an employee is hired remotely and has a third-party employer agent complete Form I-9, for E-Verify purposes the “hiring site” is the location of the third-party employer agent where Form I-9 was completed, not the home of the employee. To add multiple hiring sites, See Section 2.1.3, Bulk Upload of Hiring Sites. - To designate a person with authority to sign the MOU, click Add MOU Signatory, enter information and then click Add MOU Signatory.
IMPORTANT: Every employer must have at least one person assigned as a contact for E-Verify issues. One of your client’s contacts must serve as the MOU signatory. The MOU signatory is the person with authority to bind the client company to the E-Verify terms and conditions and his or her name will appear on the client MOU. The MOU signatory can also serve as a contact for the client. - Click Next to continue.
- Review the client information and click Submit Enrollment. After the enrollment request is submitted, the status changes to Pending Registration. E-Verify employer agents can search for a client in Pending Registration status to update or delete the registration.
An email is sent to the MOU signing authority that you assigned during enrollment. Your client will need to electronically sign the MOU once the client receives the email. The client has 24 hours to view, sign or decline the MOU. If the client accidentally declines the MOU or the link expires, you can resend the request for the client to sign the MOU. See Section 2.1.2, Re-send Electronic Client MOU.
Upon enrollment, E-Verify employer agents must provide the E-Verify Participation and Right to Work posters in English and Spanish to their clients (both appear below). Clients must display both posters in prominent locations clearly visible to prospective employees and all employees, including those hired to work in a remote setting. This can include displaying the posters digitally, online, in hard copy at physical locations, and providing a copy of the posters with job application materials. In addition to displaying the English and Spanish versions of the E-Verify Participation poster, you may also display any of the foreign language versions provided by E-Verify.
E-Verify employer agents should provide the client with new participation posters when updates are made by DHS so that employees, applicants, and the public have the most recent and complete information regarding E-Verify. After logging in to E-Verify, the posters are found under View Essential Resources.
E-Verify Participation Notifications
Notice of E-Verify Participation
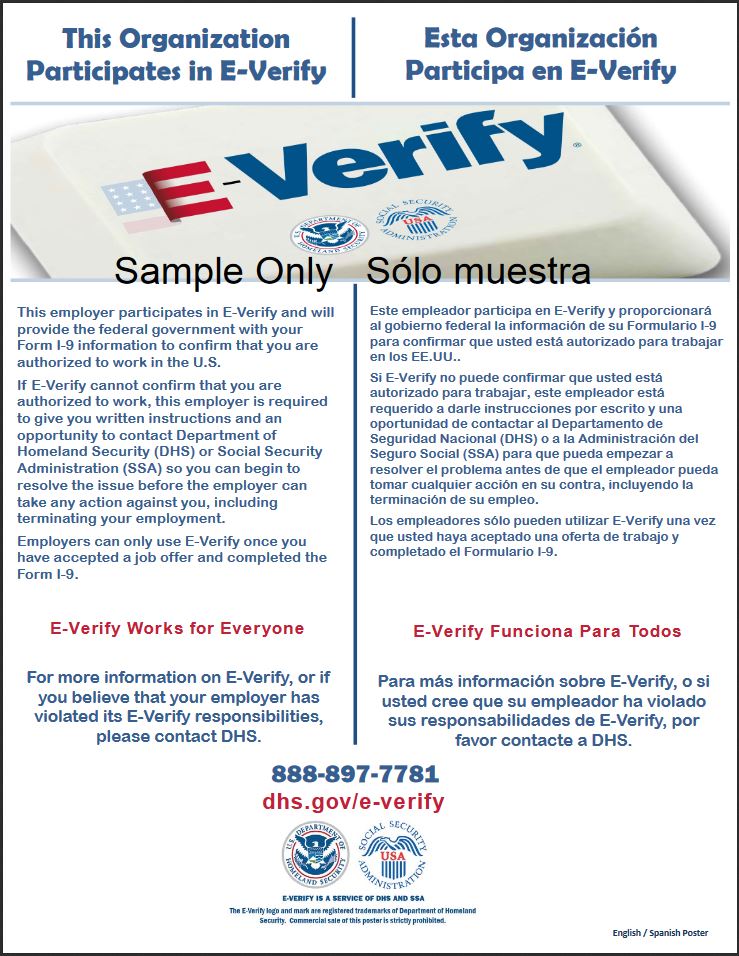
Provided by DHS
Right to Work Poster
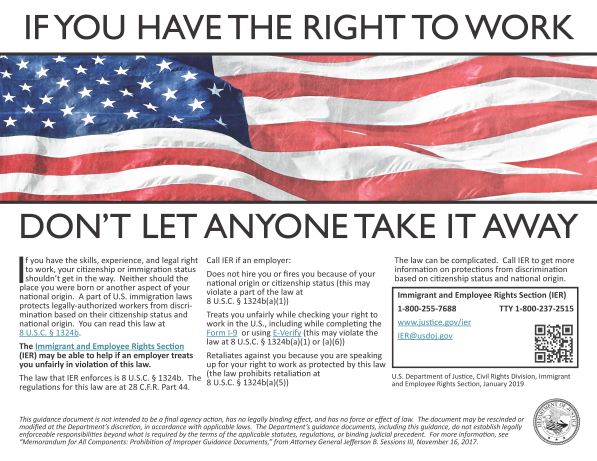
Issued by Department of Justice, Immigrant and Employee Rights Section